Heat styling is a trade-off.
You get sleek, smooth, bouncy, camera-ready hair. In exchange, you accept a certain amount of stress on your strands. That's the deal, and millions of people make it every day.
The question isn't whether heat causes damage. It does. The question is how much damage, and whether you can minimize it while still getting the results you want.
The answer is yes, if you approach heat styling as a system rather than a single step. Spraying on a protectant and hoping for the best isn't enough. Real protection happens before you pick up the tool, while you're using it, and after you put it down.
Here's the complete framework.
What Heat Actually Does to Your Hair
Understanding the damage helps you prevent it. Let's look at what's happening at the strand level.
The Protein Bond Problem
Your hair is mostly keratin: a protein held together by different types of chemical bonds.
Hydrogen bonds are weak and temporary. They break when hair gets wet and reform when it dries. This is why your hair changes shape after washing. Heat also breaks hydrogen bonds, which is how flat irons and curling wands reshape your hair.
Disulfide bonds are stronger and permanent. They're responsible for your hair's underlying structure, whether it's naturally straight, wavy, or curly.
Here's the problem: excessive heat doesn't just break hydrogen bonds. It starts damaging disulfide bonds too. Once those are compromised, the structural integrity of your hair is permanently affected. That strand will never fully recover — it can only be grown out and cut off.
Moisture Loss: The Invisible Damage
Hair contains water inside the shaft. When you apply high heat, that water rapidly evaporates, sometimes so fast it essentially boils.
This moisture loss makes hair increasingly dry and brittle over time. The frustrating part? This happens even before you see visible damage. Your hair can be losing internal moisture with every heat session while still looking relatively normal on the surface.
By the time you notice the dryness, the cumulative damage is already significant.
The Cuticle Effect
The cuticle is your hair's protective outer layer, overlapping scales that lie flat on healthy hair, reflecting light and creating shine.
Heat lifts and roughens these cuticle scales. The result:
- Dullness — rough cuticles scatter light instead of reflecting it
- Tangles — raised scales catch on each other
- Increased vulnerability — open cuticle exposes the inner cortex to further damage
- Moisture escape — lifted cuticles let internal hydration evaporate faster
Signs Your Hair Is Already Heat Damaged
Not sure if your current routine is causing problems? Look for these patterns.
The Symptom Checklist
- Persistent dryness that deep conditioning doesn't fully resolve
- Brittleness and breakage, especially at the ends
- Loss of elasticity: healthy hair stretches slightly and bounces back; damaged hair snaps or stays stretched
- Dullness even right after washing and conditioning
- Rough, straw-like texture
- Excessive split ends or "white dots" along the strand (visible fractures in the cortex)
- For curly hair: loss of curl pattern, limp or undefined curls, sections that no longer spring back
The Hard Truth About Repair
Here's something the hair care industry doesn't always make clear: true structural damage cannot be reversed.
Once disulfide bonds are broken and the cortex is compromised, no product can restore that strand to its original state. The damage grows out, it doesn't heal.
That said, cosmetic improvement is absolutely possible. Products can temporarily smooth the cuticle, add shine, reduce friction, and make damaged hair look and feel significantly better. They're managing the damage, not undoing it, but that management makes a real difference in how your hair behaves day to day.
The goal is twofold: improve the appearance of existing damage while preventing further damage going forward.
Before: Preparing Your Hair for Heat
Protection starts before you ever touch the styling tool.
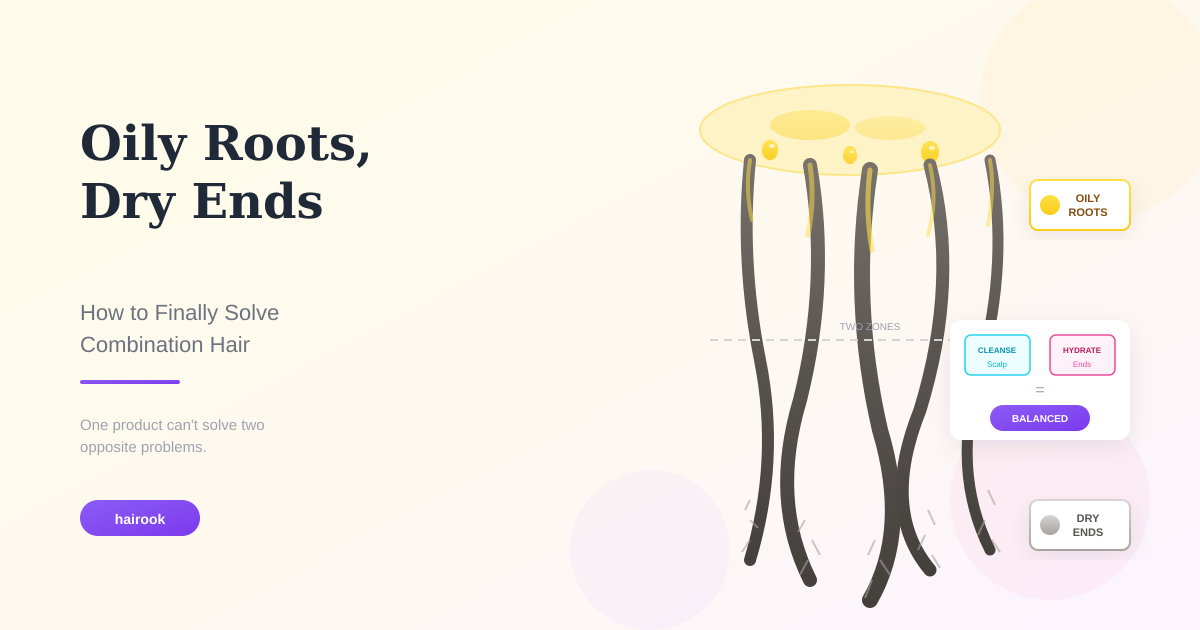
Start with Clean, Mostly Dry Hair
Product buildup matters. Old styling products, dry shampoo residue, and accumulated oils can essentially "cook" onto your hair when exposed to high heat, causing additional damage and making hair look dull.
Start with freshly washed hair when possible, especially for flat ironing or curling.
Moisture level matters too. Applying a 400°F (~200°C) flat iron to soaking wet hair is a recipe for disaster. The water inside the strand flash-boils, creating steam that damages the hair from within.
For flat irons and curling irons: hair should be completely dry.
For blow drying: start when hair is about 70-80% dry. This minimizes heat exposure while still allowing you to create shape and smoothness.
What Heat Protectants Actually Do
Heat protectants aren't magic forcefields. Understanding what they actually do helps you use them effectively.
Barrier formation. Most protectants coat the strand, creating a physical layer between the tool and your hair. This doesn't eliminate heat transfer, it moderates it.
Heat distribution. Some ingredients help spread heat more evenly across the strand rather than concentrating it in one spot.
Friction reduction. Protectants add slip, allowing styling tools to glide smoothly. This reduces physical friction damage on top of heat damage.
Ingredients That Actually Protect
Not all heat protectants are equally effective. Here's what to look for:
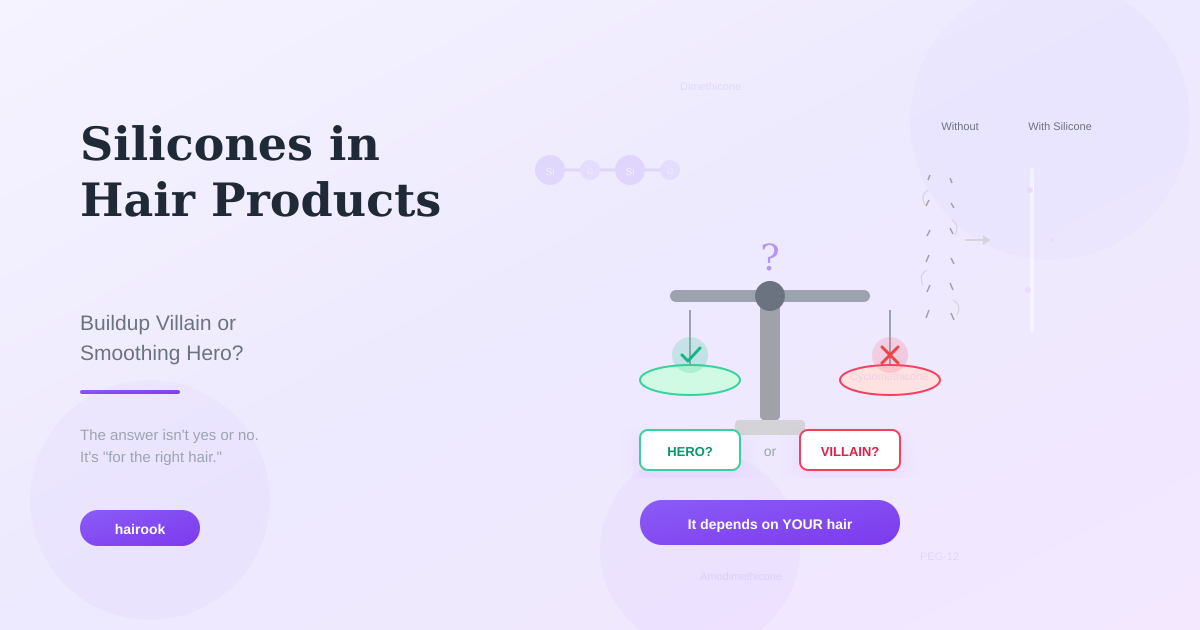
Silicones (dimethicone, cyclomethicone, phenyl trimethicone): The workhorses of heat protection. They form a coating that shields hair and adds slip. Water-soluble silicones offer protection without heavy buildup.
Hydrolyzed proteins (keratin, wheat protein, silk amino acids): Temporarily bond to hair, reinforcing the strand and filling in gaps in damaged cuticles.
Film-forming polymers (PVP, polyquaterniums): Create a protective film that can withstand moderate heat.
Natural oils (argan, coconut, marula): Provide some heat buffering and add moisture, but are less effective as standalone protectants. Better as a supplement to silicone-based formulas.
How to Apply Heat Protectant Properly
Even the best protectant fails if applied wrong.
- Distribute evenly throughout mid-lengths and ends, not just the top layer
- Don't skip the underneath. The layers closest to your neck often get the most tool contact and the least product
- Allow absorption. Give the product 30-60 seconds to absorb slightly before applying heat. Applying heat to a soaking-wet protectant can reduce its effectiveness
During: Smart Heat Styling Technique
The tool is in your hand. Here's how to minimize damage while you work.
Temperature Matters More Than You Think
Higher temperature doesn't mean better styling. It means faster styling at the cost of more damage per pass.
The goal is finding the lowest temperature that achieves your desired result in one to two passes.
General temperature guidelines:
| Hair Type | Recommended Range |
|---|---|
| Fine or thin hair | 250–300°F (120–150°C) |
| Medium, normal hair | 300–380°F (150–190°C) |
| Thick or coarse hair | 380–450°F (190–230°C) |
| Damaged or color-treated | Drop 20–30°F from your usual setting |
These are starting points. Your hair may need adjustments based on its specific condition and your styling goals.
One Pass Is Better Than Five
Here's a counterintuitive truth: multiple passes at a lower temperature often cause more cumulative damage than one or two passes at a slightly higher temperature.
Each pass exposes the strand to heat again. Five passes at 300°F (~150°C) can damage more than two passes at 350°F (~170°C).
Experiment to find the temperature that styles your hair in minimal passes. That's your sweet spot.
Tool Quality Matters
Not all flat irons and curling wands are equal.
Cheap or old tools often have uneven heat distribution — hot spots that exceed your set temperature while other areas underperform. This means inconsistent results and unpredictable damage.
Quality tools with ceramic, tourmaline, or titanium plates distribute heat more evenly. They also tend to maintain consistent temperature throughout use.
This isn't about brand names, it's about functional heat distribution. A well-made $60 tool often outperforms a poorly designed $150 one.
Section Properly
Working with sections that are too large means the inner strands don't get styled, so you make more passes to compensate.
Smaller sections = more direct contact = fewer passes needed = less cumulative heat exposure.
Take the extra two minutes to section properly. Your hair will thank you.
After: Recovery and Maintenance
You've put down the tool. Protection continues.
Let Hair Cool Before Touching
Hair is most vulnerable immediately after heat styling. The bonds are still resetting as the strand cools back to room temperature.
Brushing, pinning, or aggressively styling hot hair can cause breakage and prevent your style from setting properly. Give it a minute or two to cool before touching.
Moisture Replenishment
Heat styling is inherently dehydrating. Every session pulls moisture from the strand.
Building regular deep conditioning into your routine helps counterbalance this loss. Focus on hydrating ingredients:
- Glycerin
- Aloe vera
- Hyaluronic acid
- Panthenol
- Natural butters and oils (as sealants)
How often? If you heat style multiple times per week, a weekly deep conditioning treatment is reasonable. Adjust based on how your hair feels.
Protein Treatments: With Caution
Since heat damages protein structures, it makes sense that protein treatments would help. And they can, but with an important caveat.
Hair that's already brittle and damaged can become more brittle with excess protein. Protein adds strength but reduces flexibility. Too much makes hair stiff and prone to snapping.
The solution: balance protein and moisture. If your hair feels mushy, weak, or overly stretchy, it likely needs protein. If it feels stiff, dry, and snaps easily, it needs moisture, not more protein.
Alternate between protein-based and moisture-based treatments rather than layering protein constantly.
Give Your Hair Rest Days
The most effective damage prevention strategy? Use heat less often.
Daily heat styling compounds damage faster than weekly styling, even with perfect protection. Every heat-free day is a recovery day.
This doesn't mean abandoning styling. Consider:
- Air-dry days with braids, twists, or buns
- Heatless curling methods (overnight rollers, sock curls)
- Embracing your natural texture one or two days per week
Even reducing from daily to every-other-day makes a measurable difference over time.
Heat Styling by Hair Type
One-size-fits-all advice fails because different hair types respond differently to heat.
Fine Hair
Fine strands are more vulnerable. The cortex is thinner, so heat penetrates faster and damage accumulates quickly.
- Use the lowest effective temperature, often 250-300°F (~120-150°C) is sufficient
- Choose lightweight protectants that won't weigh hair down
- Be especially conservative – damage shows faster on fine hair
Thick or Coarse Hair
Thicker strands can generally tolerate higher heat, and may require it for styling to hold.
- Higher temperatures (up to 450°F (~230°C)) may be appropriate
- Richer, more robust protectants work well
- Still avoid exceeding 450°F (~230°C) – even coarse hair has limits
Curly Hair Being Straightened
Straightening curly hair is a high-risk activity. You're using high heat to temporarily break and reform the hair's natural structure repeatedly.
- Extra protection is non-negotiable: use a high-quality protectant generously
- Consider occasional rather than daily straightening to preserve curl health
- Watch for loss of curl pattern: this signals cumulative damage affecting hair structure
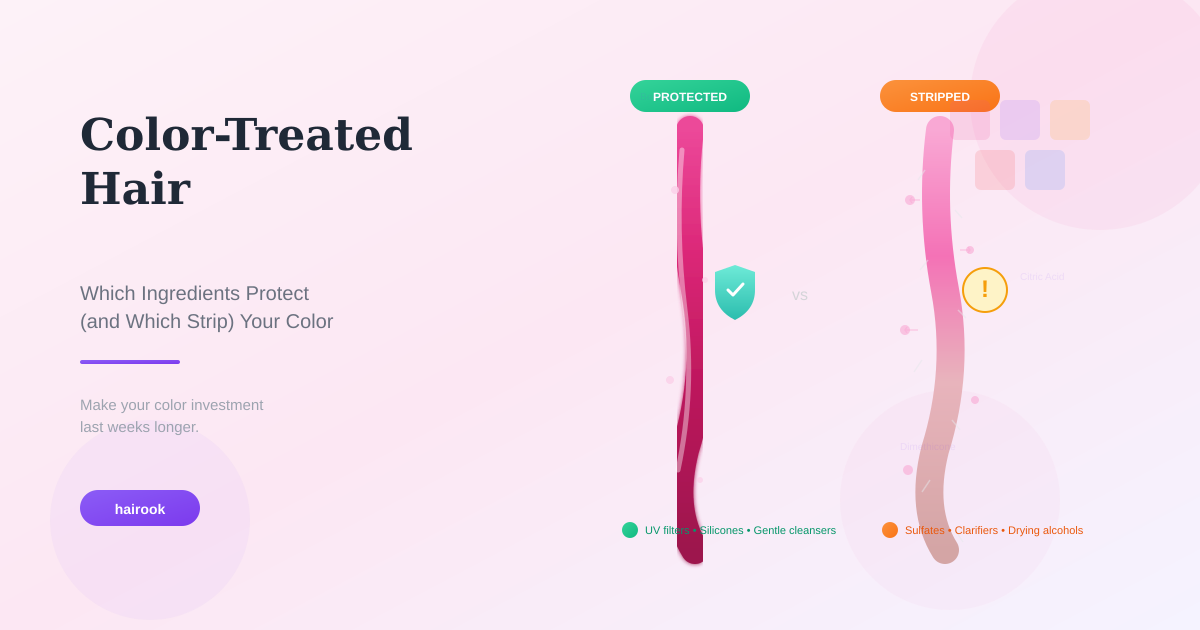
Color-Treated Hair
Color processing already opens and damages the cuticle. Adding heat compounds the vulnerability.
- Lower your temperature 20-30°F (~10-20°C) from what you'd use on virgin hair
- Prioritize protectants with cuticle-smoothing ingredients
- Know that heat accelerates color fade: you may need to color more frequently
The Bottom Line
Heat styling doesn't have to mean destroying your hair. But it does require intention.
The framework is simple:
- Before: Clean hair, proper protectant, correct application
- During: Right temperature for your hair type, minimal passes, quality tools
- After: Cool down, moisture replenishment, regular rest days
What "safe" heat styling looks like depends entirely on your hair its type, current condition, and history. Fine, damaged, color-treated hair has a much narrower margin for error than thick, virgin hair.
If you're unsure which protectants suit your hair type and styling habits, tools that match products to your specific profile can help you filter through options that actually fit your situation, rather than grabbing whatever's on sale.
Because the goal isn't to stop styling. It's to keep styling without sacrificing the health of your hair.